|
 

Airframe Directive (A.D.)
And other helpful notes
Ultra Bandit
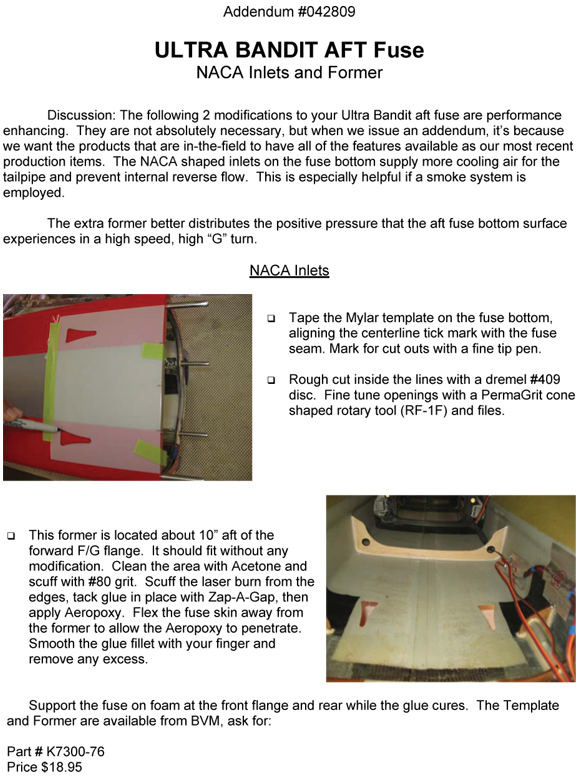
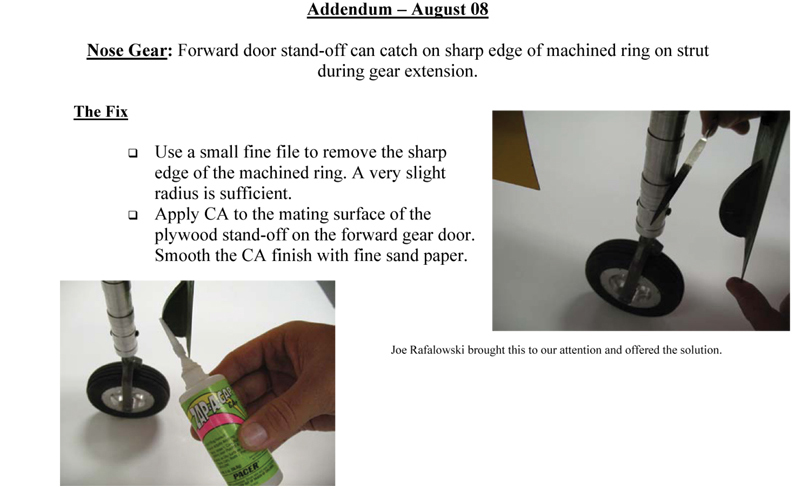
Addendum #120216
Update to instruction manual page 44
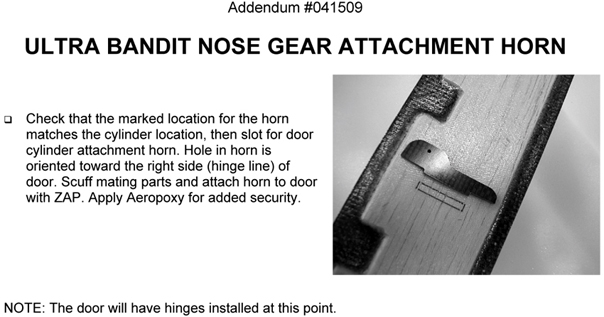
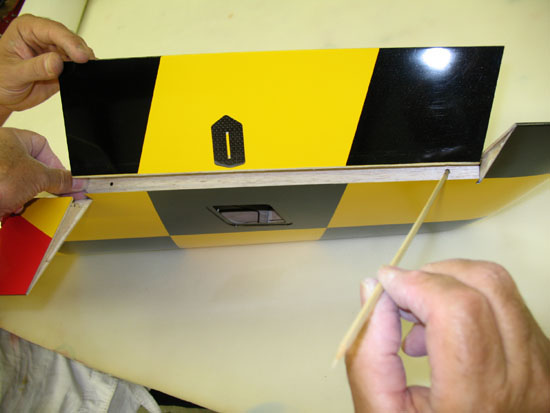
Ultra Bandit Wing Flap Gage
1/8" Laser cut Plywood
See also page 44 of the
Ultra Bandit Manual dated December 2, 2016.
|

MANUAL |
The Assembly and
Operations Manual for BVM's Flag Ship "Ultra Bandit"
has been completely updated. It reflects all
Hi Voltage radio components, application of the
E-Brake, the Hi-Flow Fuel System, and various new
engine installations. The Ultra Bandit just
got lighter, easier to assemble, and more efficient.
If you purchased your
Ultra Bandit after 1 January 2014 and it is not
finished and flying, BVM will send you a
Version 2.2 at no charge.
Just give us a
call to confirm. |
Ultra Bandit
Addendum #032812
Update to instruction
manual page 41
Ultra Bandit
Addendum #010612
Update to instruction manual pages 66-67
Click here to
download the update (pdf file) (1,124 KB)
Parts sold as a
package.
Part # K7300-75
Price $42.00
ASSEMBLY &
OPERATION MANUAL
Addendum
#120208
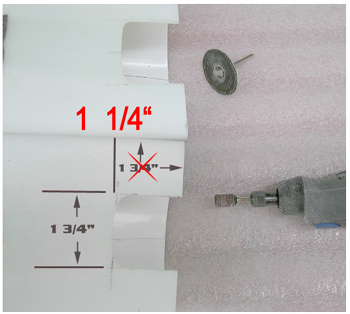 |
Page 18 of the manual shows (2)
dimensions of 1 3/4". The upper dimension should read 1 1/4" |
ASSEMBLY &
OPERATION MANUAL
Addendum
#080808
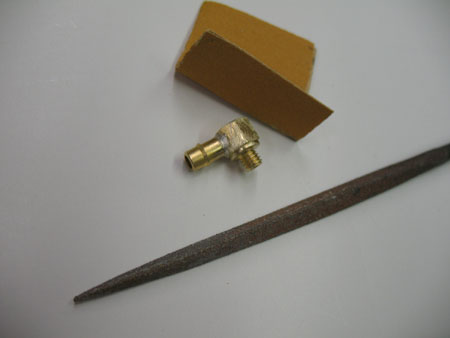
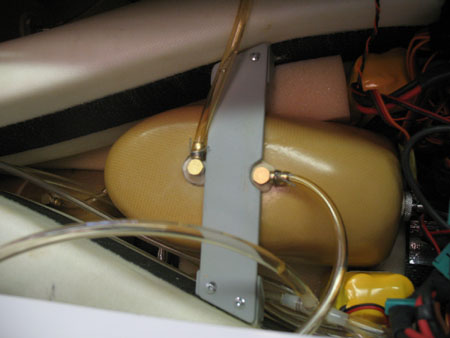
Installing An
Additional 90
Brass Fitting
in completed Kevlar Header Tank
use BVM part # 3097A
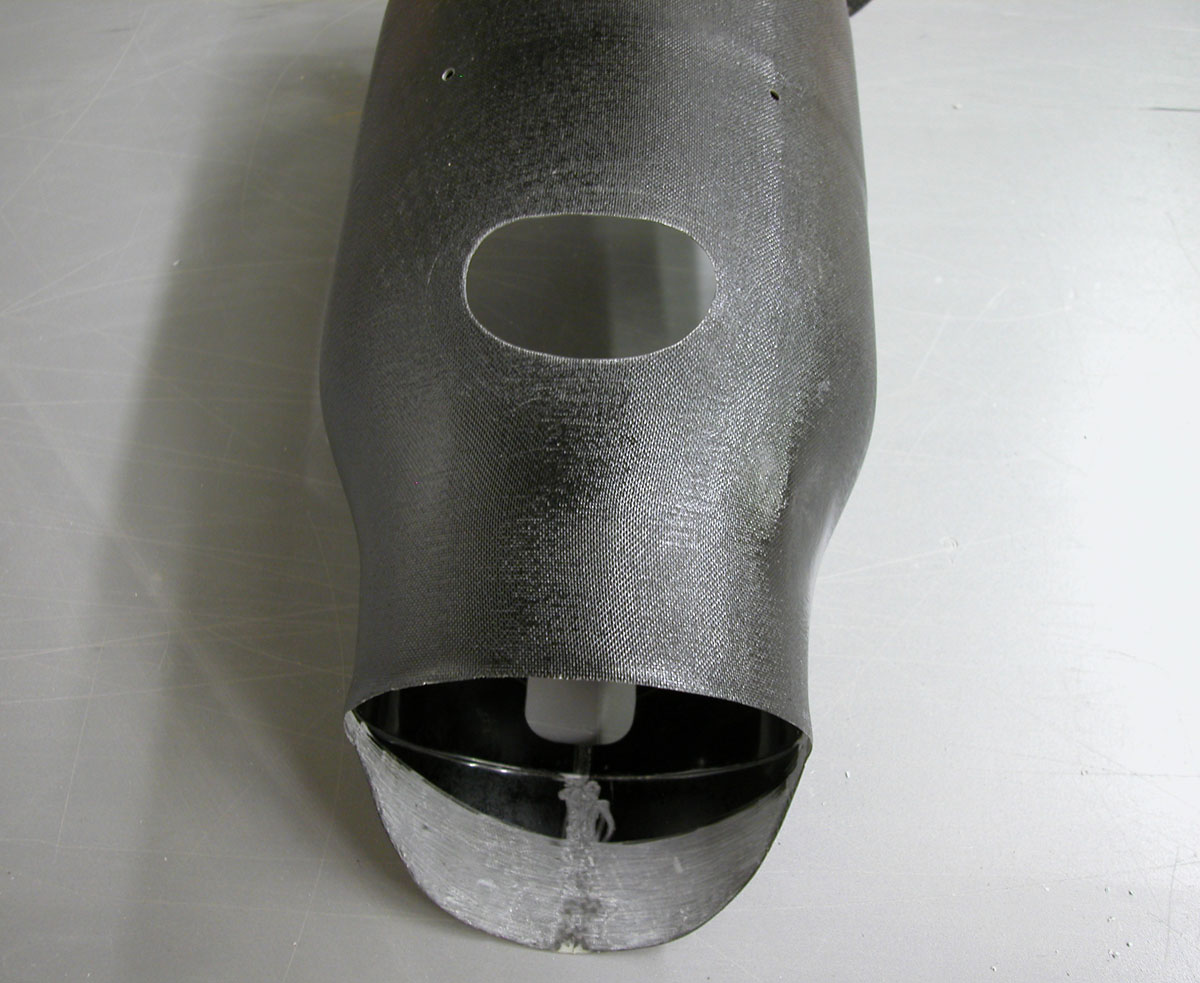
| Remove the alum. fitting
and clunk assembly from the front of the tank. Flush the inside of the
tank with Acetone or Lacquer Thinner and clean the outside surface as well. |
| |
|
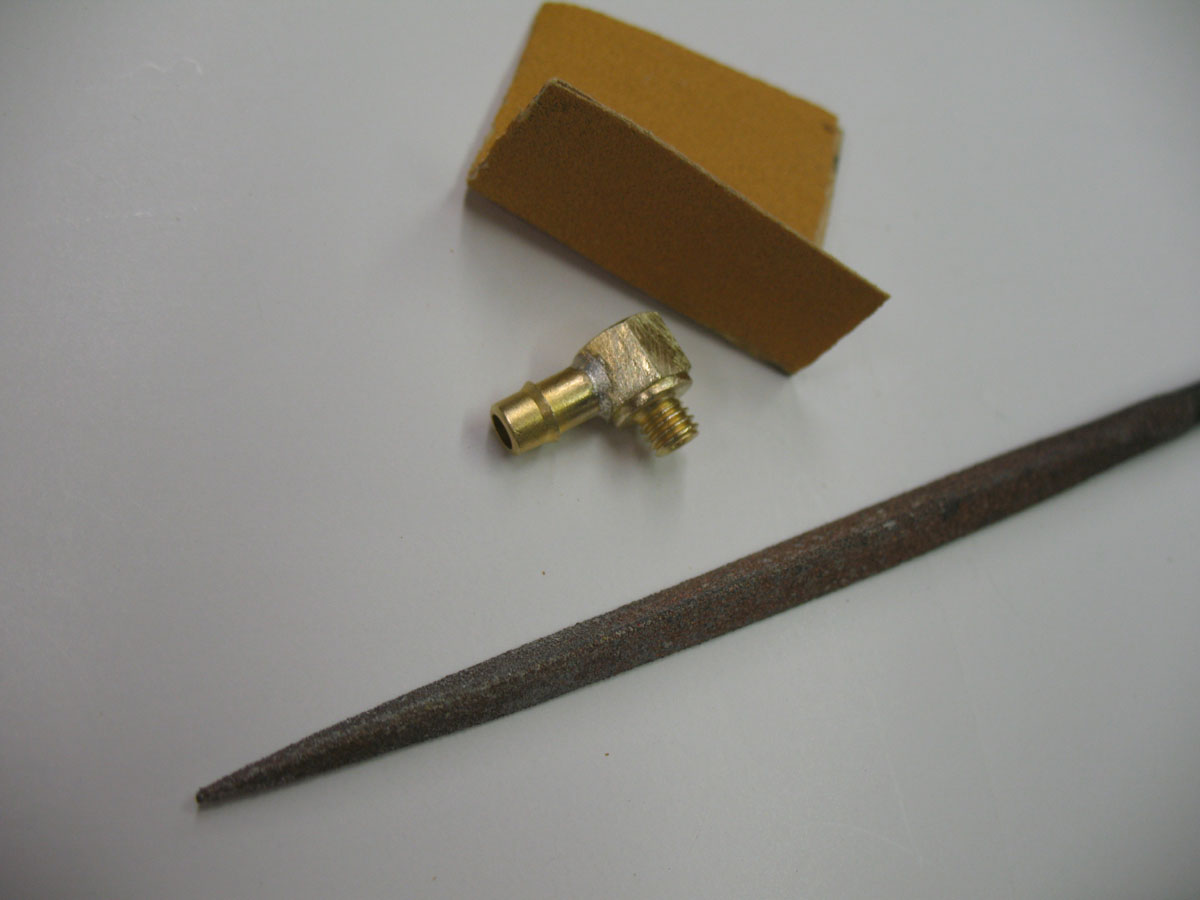
| Thinner clean and scuff the outside
surface of the brass fitting with sandpaper and file. Check that the
drilled passage in the fitting is clear. |
 |
| |
|
|
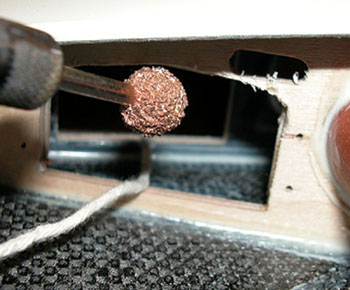
Mark and scuff an area as shown, then drill
a hole with a #21 bit. Use a vacuum hose next to the drill to collect
the fibers. Self thread the fitting into the tank, then remove. |
| |
|
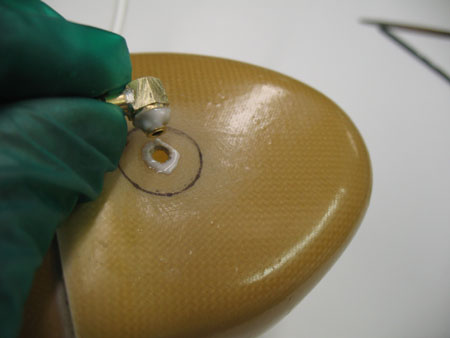 |
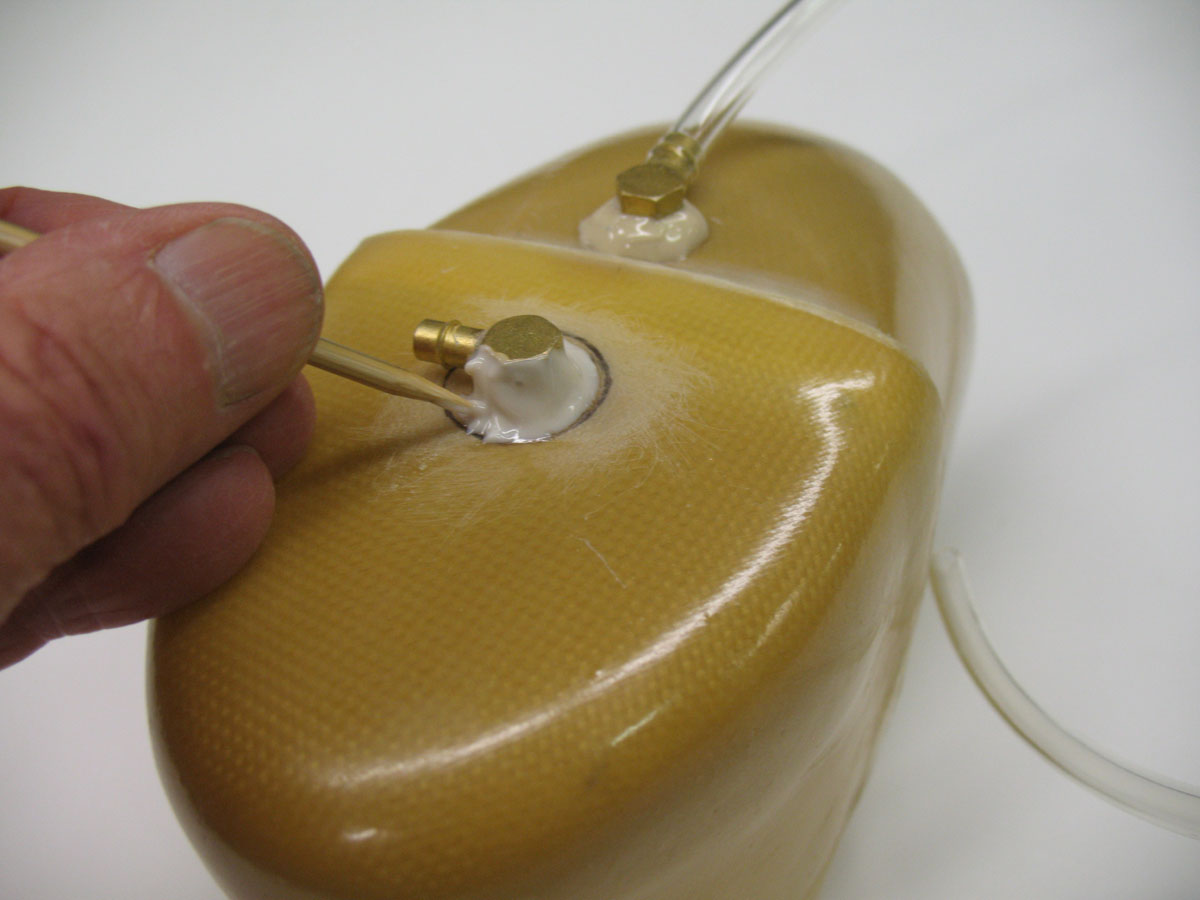
Apply Aeropoxy to fitting and around the
drilled hole and thread it into the Kevlar. Orient the fitting to
desired direction.
|
| |
|
|
Use a toothpick to position glue for a
completely filleted bond. Allow to cure.
|
 |
| |
|
 |
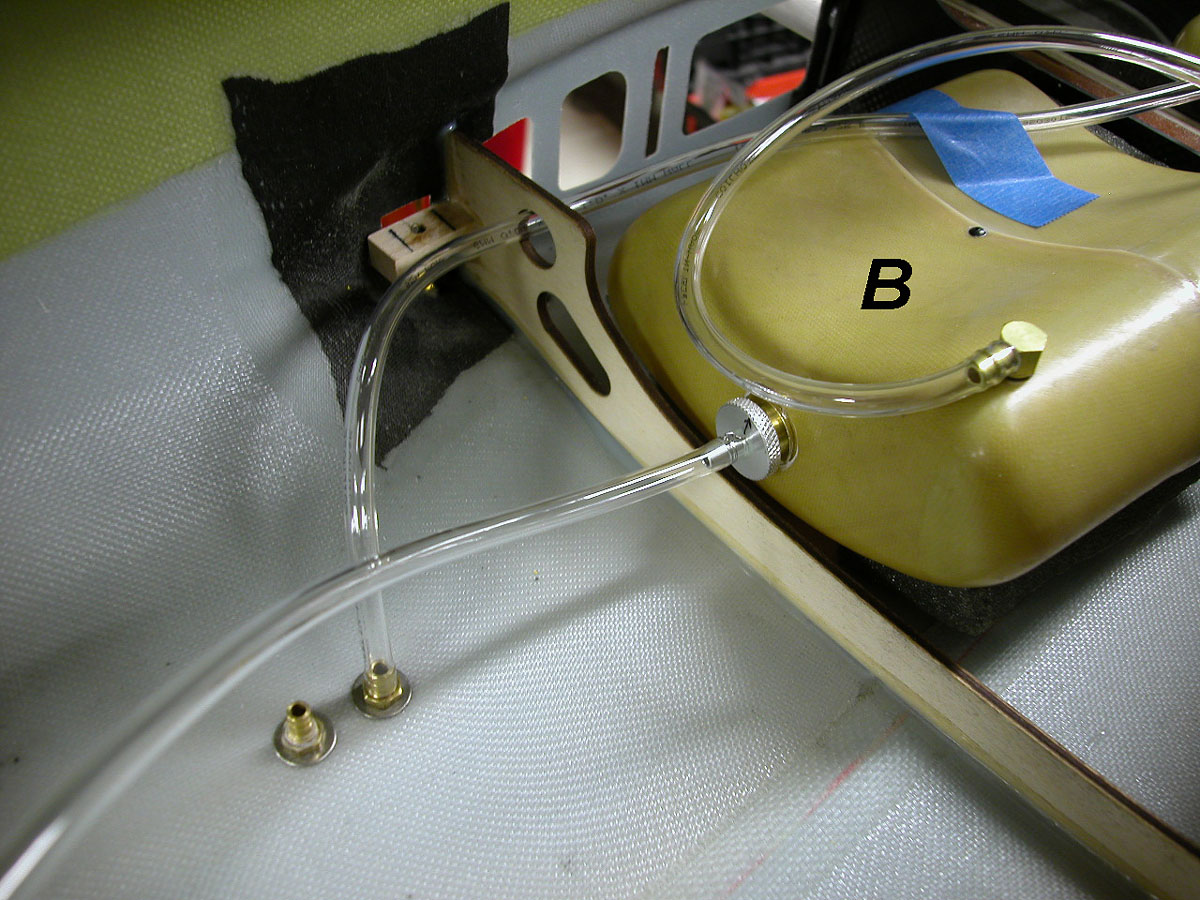
Plumb each Saddle Tank fuel line to its
separate "In" fitting on the top of the header tank. |
ASSEMBLY &
OPERATION MANUAL
Addendum
#070308
Large Engine
Fuel Systems Modification
Click To Enlarge
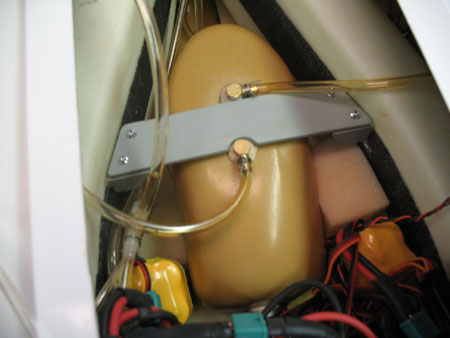
Ultra Bandit Header Tank
Under certain combinations
of high throttle and low throttle use, there have been a fuel
supply deficiency problems.
The Fix
Add a 2nd "In" (90 )fitting
to the top of the header tank and eliminate the "T" fitting.
Plumb the saddle tanks (fuel pick up lines) directly to each of
the 2 "In" fittings on the header tank.
This modification is
applicable to turbine engine installations like the JetCat P-180
and P-200.
90 Brass Fittings
available from BVM
Part # 3097A
Price: $3.75 each
ASSEMBLY &
OPERATION MANUAL
Addendum
#052908
Aileron Hinge Stiffener
 |
Installing these 1/8" balsa sub spars takes only a few
minutes to accomplish and the result is a more stable aileron hinge system.
There is less likelyhood that the aileron bottom leading edge will encounter
(catch on) the wing trailing edge as the model is subjected to climatic
changes. |
This is a worthwhile
upgrade to your Ultra Bandit.
The cost of the parts and
shipping in the USA is $12.00
outside the USA $22.00
Order Online!
Kits delivered post June 1, 2008 have the mod
factory installed.
In The USA
BVM #K7300A-37
$12.00 |
|
Outside The USA
BVM #K7300A-37
$22.00 |
|
ASSEMBLY &
OPERATION MANUAL
Addendum
#041608
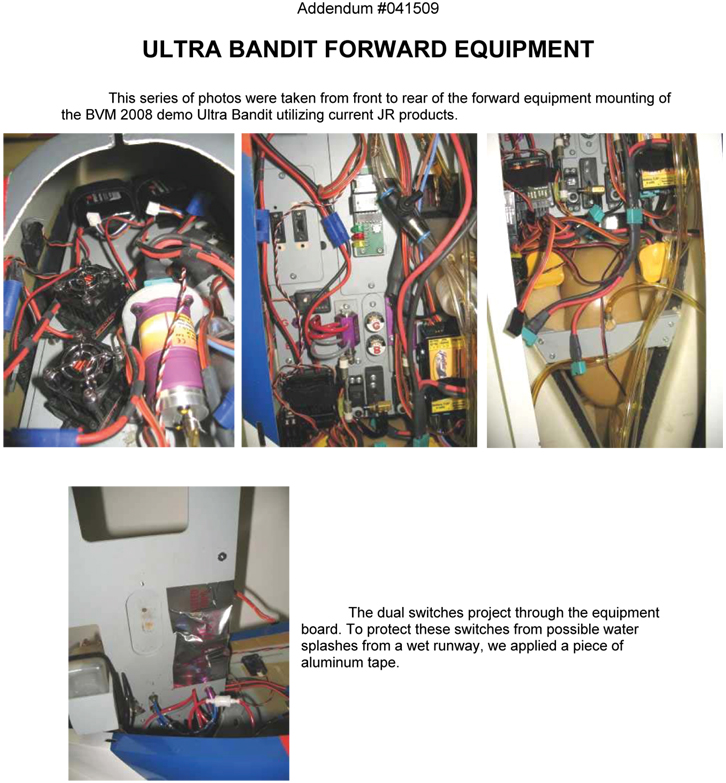
Equipment Installation
ASSEMBLY &
OPERATION MANUAL
Addendum
#031408
The correct "Y"
Harness to use for the 2.4 radios is the JRPA135.
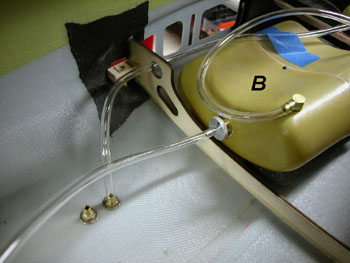
Ultra Bandit
Smoke Tanks
We adapted 2 BVM
Kevlar tanks to provide sufficient volume for a smoke system.
Assemble the tanks with AeroPoxy per the same method as used with
the fuel system tanks.
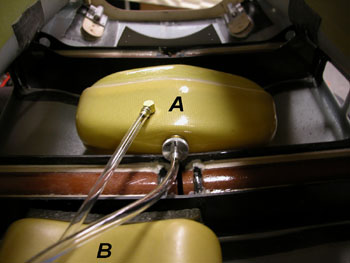
Tank A is located between the
wing spar mounts. Make a 1/16" round notch in the wing box to
accept the brass neck. The brass fitting on the top of "A"
vents to the overflow fitting.
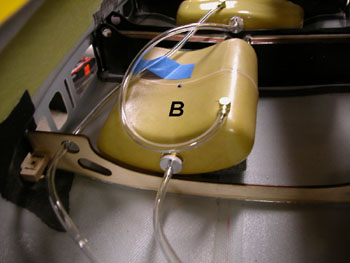
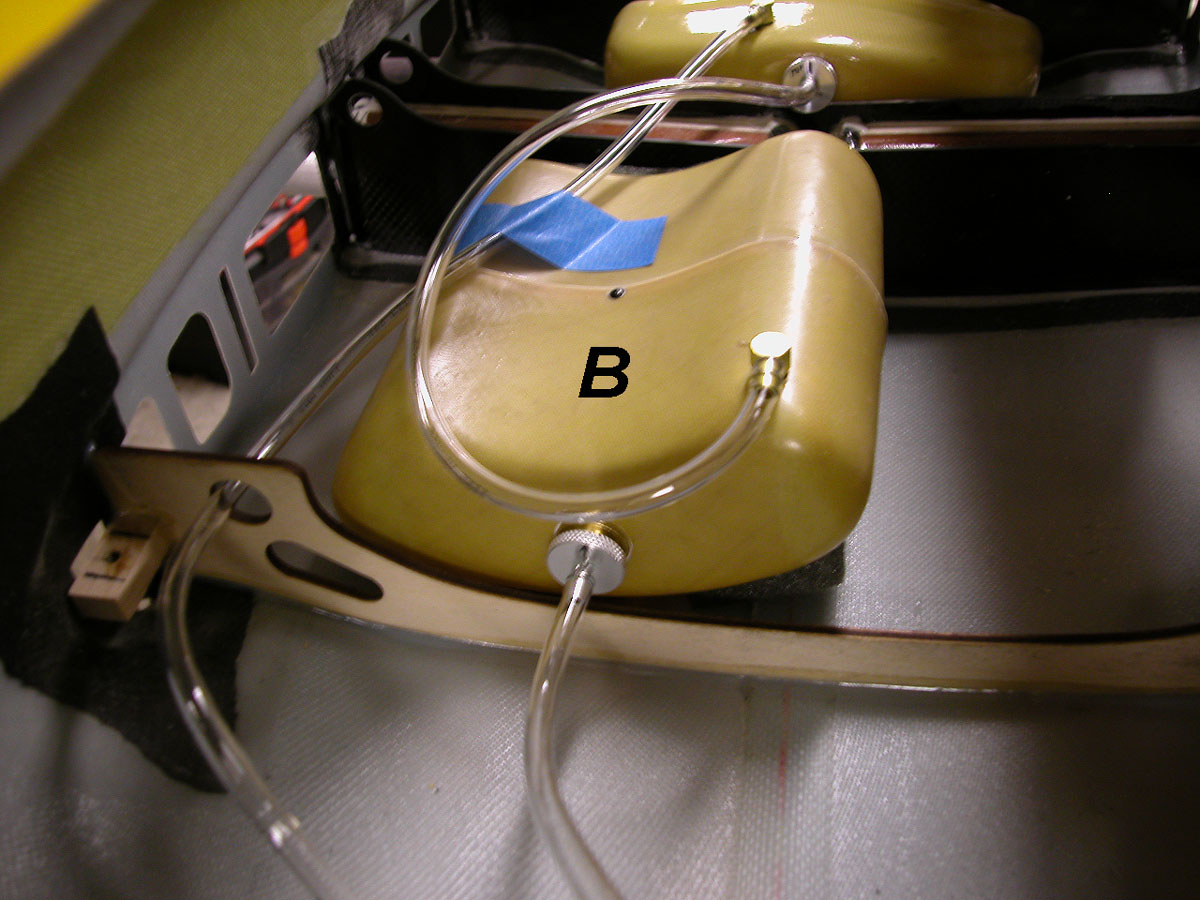
The B tank rests under one of
the inlets. You can hold it in place with adhesive backed
velcro or foam. "B" tank draws smoke oil from tank "A" and
delivers it to the smoke pump through a rotary on - off valve.
A "T" fitting in this line
allows filling the tanks.
The overflow from tank "A"
exits the bottom of the fuselage through a brass fitting just aft of
the fuel system overflow.
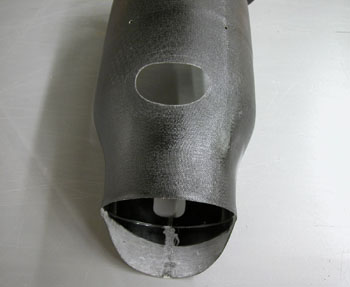
Some installations may require
a clearance hole in the bottom of the By-Pass duct.
Apply aluminum tape to the area
of the tank that protrudes into the By-Pass.
Ultra
Bandit
Addendum #110707
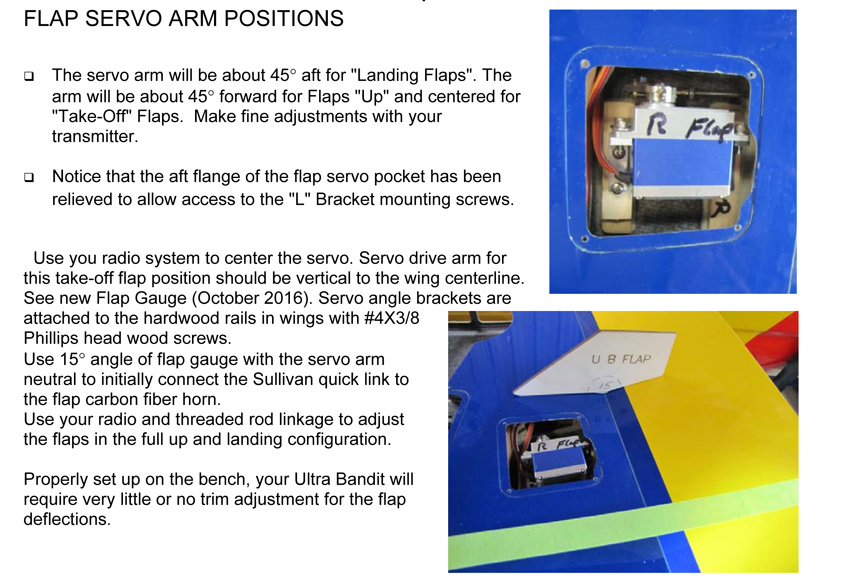
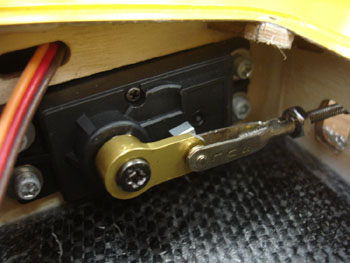
| Flap Servo Mounting and
Linkage Installation, supplemental photos and instructions for pages 43 and
44 of the Ultra Bandit assembly manual. |
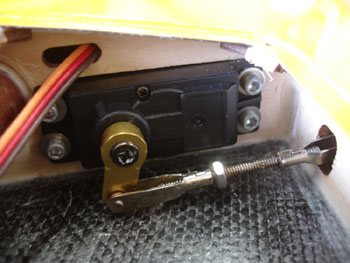
| Follow the instructions given in the
manual using these specially made aluminum servo arms. These arms come
pre-fitted with a matching clevis. Do not mix these clevises with any
other clevises. The holes have been sized to accept the corresponding
pin to minimize slop. Note: These control
arms have a very tight fit onto the splines of the servo shaft. Make
sure the flap travel is checked before tightening the black servo screw. |
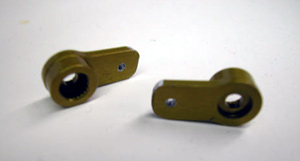 |
| Please call is you wish to
purchase these servo arms. |
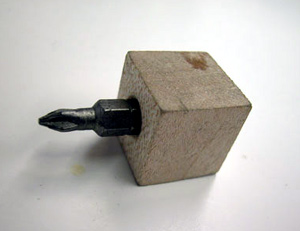 |
As seen on page 44, a short "Phillips"
driver bit works well in this close situation. Make a simple handle
from a maple block for increased leverage. |
Ultra
Bandit
Addendum #101707
FLAP
SERVO INSTALLATION
| Use a PermaGrit ball end rotary cutter to grind an arch in the
plywood rib servo pocket. |
 |
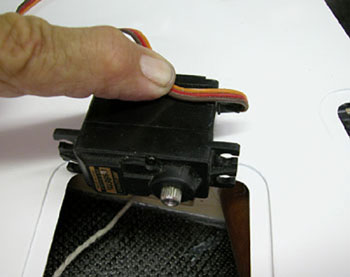 |
Position
the servo wire as shown to install the servo. The wire passes
through the arch. |
|
Note: This applies to kits manufactured prior to October
07,2007. |
Ultra Bandit
Addendum #030707
FACTORY INSTALLED FIN & STAB BRACKETS - ADD AEROPOXY
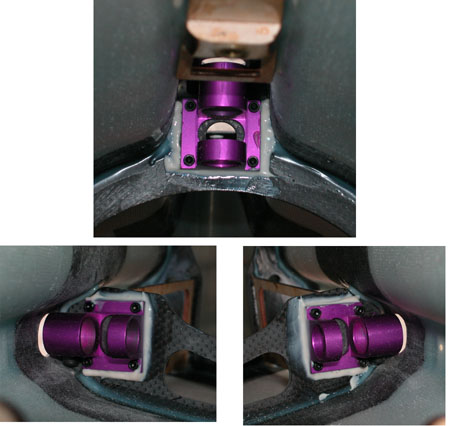
Add a bead of Aeropoxy to 3 sides of the stab and fin
mounting brackets. Attach a 12 -14 piece of 4mm fuel line to
the glue nozzle and hand guide it into position.
 Extensive
flying of the #2 prototype caused the fin
bracket to develop a little side to side play. This procedure
will prevent this from occurring with your Ultra . Kits
manufactured post 1/1/07 include this addendum.
FUEL CELL DISCUSSION
The #2 prototype Ultra has been flying with the new larger fuel
cells (BVM #K7300-30) which hold 6.2 Liters of fuel. A JetCat
P-180 is installed and the flight time is 17 minutes. The same
tanks with an AMT Olympus will provide 13-14 minute flights (as
tested in a customers Ultra). If you decide to land early with
these larger fuel cells, there will still be a considerable
amount of additional weight in the model.
A 9-minute flight is suitable for most people, therefore we
would recommend using the smaller 4.8 Liter fuel cells (BVM
#K7300-35) with the JetCat P-180.
Ultra Bandit
Addendum #020907
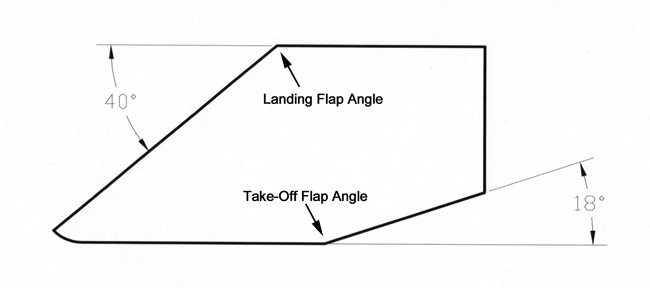
FLAPS
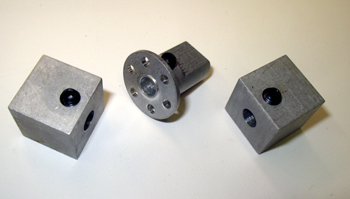
Drilled and cut metal servo arms are now available to drive
the Ultra Bandit flaps.
Ask for BVM # K7300M-MA037 Price
$25.00 (2 per pack)
Flaps in the up position.
Flaps in the down position.
Contact Us
All graphics, photos, and text
Copyright 2016 BVM, Inc.
Use of graphics or photos without written permission from
BVM is
strictly prohibited. |