 
Clear Canopy
Insertion

 This is one of the last items to accomplish in finishing a model and
since the cockpit is a very obvious, upfront visual point of the model it is
worthwhile to have the clear plastic canopy installed neatly. This is one of the last items to accomplish in finishing a model and
since the cockpit is a very obvious, upfront visual point of the model it is
worthwhile to have the clear plastic canopy installed neatly.
You may already have a favorite technique but
for those who don't, the following procedures offer a simple method.
- The fiberglass frame must be neatly trimmed by first
using a cutting wheel to rough cut to the canopy frame lines. Then, use
Perma-Grit files and small sanding blocks to fine-tune each edge. Sand the
inside of the fiberglass frame with #80 grit.
- Paint the outside of the fiberglass frame to match
the model. · Rough cut the plastic canopy to fit inside the frame. Use a
grease pencil to trace the outline of the frame onto the plastic. Use PPG #320
solvent (or similar) to remove the grease pencil marks.
- In the case of the F-4 canopy shown, we will insert
the plastic in 5 separate pieces. Carefully cut each piece 1/8" to 3/16"
outside of each grease pencil line.
- Inserting the clear canopy in small sections yields
a better fit and minimizes any possible distortion of the frame and how it fits
back onto the fuse.
- Trial fit each piece and block sand the edges of the
plastic with #80 grit to smooth the scissor cut edges.
- Paint the inside of the frame with flat black or flat
dark gray. I like to use a catalyzed paint such as PPG Concept so that it won't
peel easily when the plastic is glued in. Apply vinyl tape to the outside
surface of the frame and use a small brush to apply the paint to the inside.
Remove tape immediately and wipe away any bleed.
- Use one drop of Zap-A-Gap applied in 4 places around
the periphery of each plastic piece to tack glue it into position. Apply the
drop onto the fiberglass just next to the plastic then nudge it onto the edge
of the plastic with a toothpick. It will bleed under the edge of the plastic
but not onto the outside surface. Hold the plastic in position until glue sets.
DO NOT USE A KICKER, it could damage the plastic. Warm breath will accelerate
the cure.
- After each piece is installed, test fit the frame to
the fuse to check that is has not been distorted. If it has, pop that piece
loose and reset with better handling techniques.
- Use Pacer "Canopy Glue" applied with a small brush to
the inside junction of the plastic and the fiberglass. Apply to the entire
periphery of each part. This glue will dry perfectly clear - allow to cure
overnight. Canopy glue is water soluble for easy cleanup.
 |
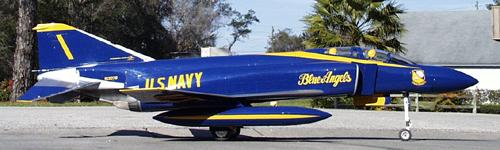 |
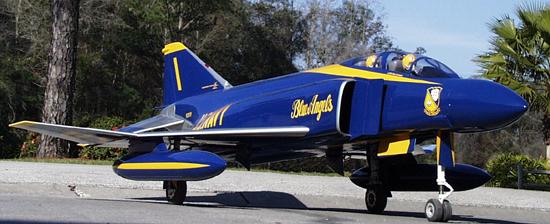
Here's a peek at Bob's
Pegasus powered Blue Angel Phantom II. |

Contact Us
All graphics, photos, and text
Copyright 2011 BVM, Inc.
Use of graphics or photos without written permission from
BVM is
strictly prohibited.
|